The Link Dialog is used to insert and edit links on a selection of content, such as text (one word, phrases or whole paragraphs) or an image.
The dialog includes a unique Link Browser which makes it easy to create a link to a content item, section, category, contact, weblink or menu item on your website.
The dialog also has features for creating e-mail address links, anchors, and has a full set of fields for inserting advanced options, such as id and accessibility data.
The Link Dialog Interface
The Link Dialog Interface is divided into three tabs, Link, Advanced and Popups
Link Tab
The Link tab includes all the fields required for creating a basic link

URL
Contains the relative path to the link either inserted by the Link Browser, File Browser, E-Mail dialog or typed / pasted in by the user.
Text
Shows the text of the link if the article selection is a text selection. If the article selection is an image or other non-text element this field will be disabled with the label Element Selection
File Browser
Opens the File Browser dialog. This dialog can be used to select a file (image, pdf etc) to create a link to.
Opens the e-mail dialog for creating e-mail links with fields for Address, CC, BCC and Subject.
Links - Search
Search for links by keyword or phrase using Joomla! Search Plugins. Search options can be set by clicking the cog icon ![]()
- Search For : Set whether the search is to be performed using all the words entered into the search field, any of the words, or the exact phrase entered.
- Ordering : Set the ordering to return the results in.
- Search Only : Set the extensions to search. If none are selected, all extensions listed will be searched.
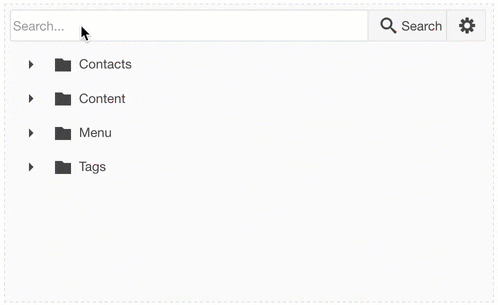
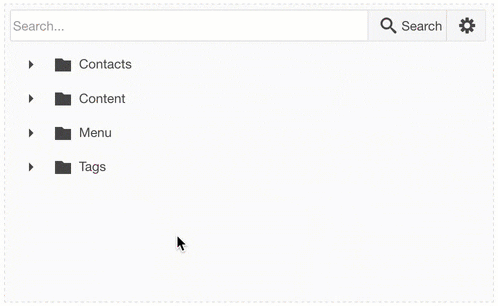
Links - Browse
Browse for links using the Link Tree. Click on the plus icon to display the next available level (usually a category or sub-category) and click on the level name to select the link.
Anchor links in the content of the level displayed will be shown below the level. For example in the image below, the anchors #access and #platform are displayed below the "Professionals" article they are contained in.
Clicking on the anchor item will insert the article link with the anchor appended eg: index.php?option=com_content&id=2#access into the URL field.

Article Anchors
A list of all anchors in the current article being edited.
Target
List of target options (how the link will open) for the link
Title
A descriptive title for the link
Create a Link
A link can be created in 3 ways, depending on the amount of information you require for the link - pasting a URL into the editor, using the Quick Link drop-down, or using the Link Dialog.
Pasting a URL into the editor
A URL copied from the browser or from an external source (such as the content of another web site) can be pasted directly into the editor. The text of link will be the same as the URL. If a selection is made before the URL is pasted, the selection will be replaced with the pasted in URL. After pasting, the link can be edited using the Quick Link drop-down, or the Link Dialog.
Using the Quick Link drop-down
The Quick Link drop-down can be used to quickly create a link on a text selection, or to edit the URL of an existing link. To use Quick Link:
- Select some text in the editor. If no selection is made, the link will be create using the URL as the text.
- Open the Quick Link drop-down by clicking on the arrow next to the Insert Link button.
- Type or paste in the link to insert. Click the link icon or press the Enter key on your keyboard.
Using the Link Dialog
The Link dialog can be used to create a link on an existing content selection (selected text, image etc) or a new link on text added in the dialog.
To create a link:
- Select some text, an image or some other element in the article to create the link on, or place the cursor in the article where you want the link to be inserted.
- Click on the Link icon
 to open the Link dialog
 - If the selected item is a text selection the text will be editable in the Text field. If the selection is an element link an image, the Text field will be disabled with the label Element Selection. If no selection was made, type some text into the Text box.


- Find the content item you want to link to using ths Search field, Link Tree or type the link into the URL field. You can also use the File Browser to find images or files to link to.
- Enter a title for the link in the Title field.

- Set the Target - how the link will open when clicked.

- Click the Insert button
Create an E-mail Address
The Link Dialog makes it easy to create e-mail address links with options for subject, cc and bcc
- Select some text or an item in the article to link on
- Open the Link dialog
- Click the E-Mail button nex to the URL field
- Enter the e-mail address in the To field, CC addresses (optional), BCC adresses (optional) and Subject (optional).

- Click the Create Email button.
Advanced Options
The Advanced Tab includes fields for setting advanced link attributes such as ID, CSS Styles, Tab Index and Access Key.

ID
Unique identifier that distinguishes the element from others in the document.
Style
List of inline css properties to be applied to the element.
Classes
List (seperated by a space) of css classes to be applied to the element. Class names can be selected from the drop-down or typed in.
Language Direction
Text direction of the element
Target Language Code
Language code of the target url
Language Code
Language code of the element, eg: en-GB
Target Character Encoding
Character encoding of the target url, eg: utf-8
Target MimeType
MIME (Multipurpose Internet Mail Extensions) Type of the target url eg: text/html
Relationship Page to Target
Relationship between the current page and the target url
Relationship Target to Page
Relationship target url and the current page
Tab Index
Tab order of the element
Access Key
Keyboard shortcut to access the element
Parameters
Link parameters can be set in the JCE Profiles in the Plugin Parameters tab.
Defaults
- Default Target - Sets the default target option for the Target list in the Link dialog.
Permissions
- Show File Browser Button - This will show a file browser button next to the URL field which will open a File Browser dialog when clicked allowing the user to create links to files.
- Show Advanced Tab - Show the Advanced tab for setting additional, advanced link options
- Show Anchor List - Show the Anchor List options in the Link dialog
- Show Target List - Show the Target List options in the Link dialog
Joomla! Links
- Content List Access - Set to Yes to allow Content Links in the Link Browser
- Contact List Access - Set to Yes to allow Contact Links in the Link Browser
- Menu List Access - Set to Yes to allow Menu Links in the Link Browser
- Weblink List Access - Set to Yes to allow Weblink Links in the Link Browser
Additional parameters may be available after installing Link Extensions.